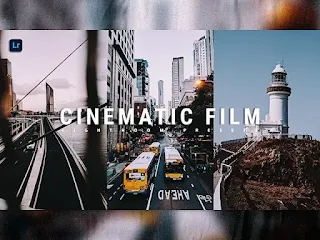
Cinematic Film Lightroom Presets XMP & DNG

Cinematic Film presets are lightroom presets that create cinematographic
effects that can change the way we understand and enjoy stories told through
moving images. Cinematic Film presets play on deep feelings and captivate
audiences by way of visual effects similar to those of movies thus creating
a dramatic, mysterious or nostalgic atmosphere often associated with classic
cinema.
Using Cinematic Film presets you can turn ordinary photos into stunning
images with a deep feel and a strong story. the Cinematic Film presets give
both amateur and professional photographers the opportunity to enhance and
customize their works without having to spend a long time mastering complex
customization techniques. with just a few clicks, you can produce immersive
and thrilling atmospheres.
The conclusion of Cinematic Film presets is that it makes it easy to produce
interesting images. in Cinematic Film presets, you can adjust colors,
balance shadows and highlights, sharpen contrast, and enhance details. thus,
Cinematic Film presets should be used as a starting point for creativity,
not as an end goal in the editing process. but, as a motivation that every
image produced retains the personal touch and uniqueness of the photographer
to tell the story in a more profound, dramatic and compelling way for the
audience.
Presets in DNG and XMP formats are compatible with :
1. Lightroom CC
2. Lightroom ClasicCC
3. Lightroom Mobile
How to Install Lightroom Presets on Desktop :
1. Open Lighroom Classic and click Develop. "Make sure to import photos
into the libary first"
2. In the left panel, click the (+) icon in the Presets panel.
3. Select Import from the dropdown menu
4. Find the ZIP file or XMP Presets file that you have downloaded and
Import it.
5. Done, you will see Cinematic Film Presets in the presets panel.
How to Install Lightroom Presets Mobile :
Before Installing Presets make sure your phone has downloaded the iZip
application to help extract ZIP files.
1. Open Lightroom Mobile and create a new album
2. Open the Album, then click Add (+) and select "From Files" then
navigate to the DNG File and Load it
3. After you add and open the DNG file, click the three dots on the top
right and select Create Preset
4. Name Free Download Presets & Save
5. to find the preset you have saved, In edit mode, navigate to 'Presets'
> 'User Presets' and click on 'Cinematic Film Presets' or click on the
presets you have created earlier
6. Done, now you can use Free Download Presets to your desired
photos.
For those of you who want to know how to make lightroom presets Cinematic
Film, we have provided a tutorial on our youtube channel.
Free Download Lightroom Presets Cinematic Film
• The file is protected by a password.
• Please check the password in this video on youtube "Lah Free Presets", will appear any time on your screen (upper middle).
• The password is a 4 digit number, will appear separately and
random.
Notes: However, keep in mind that there might be slight differences
from the examples when you use Cinematic Film Lightroom Presets. because
basically every photo has a different exposure or contrast. you can
adjust the exposure or contrast to get the colors that you think are
suitable or emphasize a certain atmosphere. so, start experimenting and
creative editing to achieve stunning results. so, don't hesitate or be
afraid to create a different and truly unique look to tempt the eye.
Make your photo more different from your friends enjoy my presets.
Thank you for visiting lightroom presets, don't forget to leave a
comment below or share this lightroom presets if useful.

Post a Comment